> ## Documentation Index
> Fetch the complete documentation index at: https://docs.pockla.io/llms.txt
> Use this file to discover all available pages before exploring further.

# Quickstart

> Get up and running with Pockla in 5 minutes

Four steps to your first personalized outreach campaign.

<Frame caption="End-to-end quickstart walkthrough">
  <video autoPlay muted loop playsInline className="w-full rounded-lg" src="https://mintcdn.com/pockla/ZzwoGSCNVW0czW3e/videos/end-to-end-quickstart-walkthrough.mp4?fit=max&auto=format&n=ZzwoGSCNVW0czW3e&q=85&s=4fc9924ffc4702ca4cf7dc8e158e79f2" data-path="videos/end-to-end-quickstart-walkthrough.mp4" />
</Frame>

## Step 1: Connect Data

Import the contacts you want to create pages for.

<Tabs>
  <Tab title="CSV Import">
    1. Click **Upload CSV** from Quick Actions on your dashboard
    2. Upload your spreadsheet
    3. Map columns to Pockla fields (email, name, company, etc.)
    4. Review and click **Import**

    <Frame caption="CSV import flow showing column mapping interface">
      <video autoPlay muted loop playsInline className="w-full rounded-lg" src="https://mintcdn.com/pockla/ZzwoGSCNVW0czW3e/videos/csv-import.mp4?fit=max&auto=format&n=ZzwoGSCNVW0czW3e&q=85&s=b9d7f109a48beef271e7ffa7f594056d" data-path="videos/csv-import.mp4" />
    </Frame>

    <Tip>
      Include at least an email column. Company name and contact name improve personalization.
    </Tip>
  </Tab>

  <Tab title="HubSpot">
    1. Click **Import from HubSpot** from Quick Actions
    2. Connect your HubSpot account
    3. Select contacts or lists to import
    4. Click **Import**

    <Frame caption="HubSpot import flow showing list selection">
      <video autoPlay muted loop playsInline className="w-full rounded-lg" src="https://mintcdn.com/pockla/u-3drTgZOvHsZmnh/videos/Connect-Data-hubspot.mp4?fit=max&auto=format&n=u-3drTgZOvHsZmnh&q=85&s=ab511452f152beab8158968cb5a8b2a8" data-path="videos/Connect-Data-hubspot.mp4" />
    </Frame>

    See [HubSpot Integration](/integrations/hubspot/overview) for full setup.
  </Tab>

  <Tab title="Manual">
    1. Go to **Contacts** in the sidebar
    2. Click **Add Contact**
    3. Enter contact details
    4. Click **Save**

    <Frame caption="Add contact modal with form fields">
      <video autoPlay muted loop playsInline className="w-full rounded-lg" src="https://mintcdn.com/pockla/u-3drTgZOvHsZmnh/videos/Connect-Data-Manual.mp4?fit=max&auto=format&n=u-3drTgZOvHsZmnh&q=85&s=1bc251dd46b95a849119b1ffa50c4189" data-path="videos/Connect-Data-Manual.mp4" />
    </Frame>
  </Tab>
</Tabs>

## Step 2: Generate Links

Create a Link Set—a collection of personalized pages, one per contact.

1. Click **Create Link Set** from Quick Actions
2. Choose your source:
   * **From a List** – Select an existing list
   * **Select Contacts** – Pick individual contacts
3. Enter the URL of the page you want to personalize
4. Use the AI chat to configure which elements to personalize
5. Preview how pages will look for different contacts

<Frame caption="Link Set creation flow">
  <video autoPlay muted loop playsInline className="w-full rounded-lg" src="https://mintlify.s3.us-west-1.amazonaws.com/pockla/videos/step-2-generate-links.mp4" />
</Frame>

## Step 3: Install Snippet

Add the Pockla snippet to enable personalization on your site.

```html theme={null}
<script>var p=new URLSearchParams(location.search).get('pklid');if(p)document.write('<script src="https://embed.pockla.io/'+p+'.js"><\/script>');</script>
```

The snippet activates when a visitor arrives via a Pockla link, loading a personalized experience for that visitor.

See [JavaScript Snippet Installation](/integrations/js-snippet/installation) for detailed setup.

<Note>
  You can skip this step initially, but you won't see engagement analytics until it's installed.
</Note>

## Step 4: Publish

Make your personalized pages live.

1. Review your Link Set in the preview
2. Click **Publish**
3. Each contact gets a unique URL (e.g., `pages.pockla.io/abc123`)
4. Share links via email, LinkedIn, or your outreach tool

<Frame caption="Link Set instances view showing generated URLs and publish button">
  <video autoPlay muted loop playsInline className="w-full rounded-lg" src="https://mintcdn.com/pockla/v59FtjWM8D6AW9ba/videos/publish.mp4?fit=max&auto=format&n=v59FtjWM8D6AW9ba&q=85&s=c5d7accfd7bd6f6623156ef8e24158ed" data-path="videos/publish.mp4" />
</Frame>

Once published, you can:

* Track views in real-time
* See engagement metrics per contact
* Push data back to HubSpot (if connected)
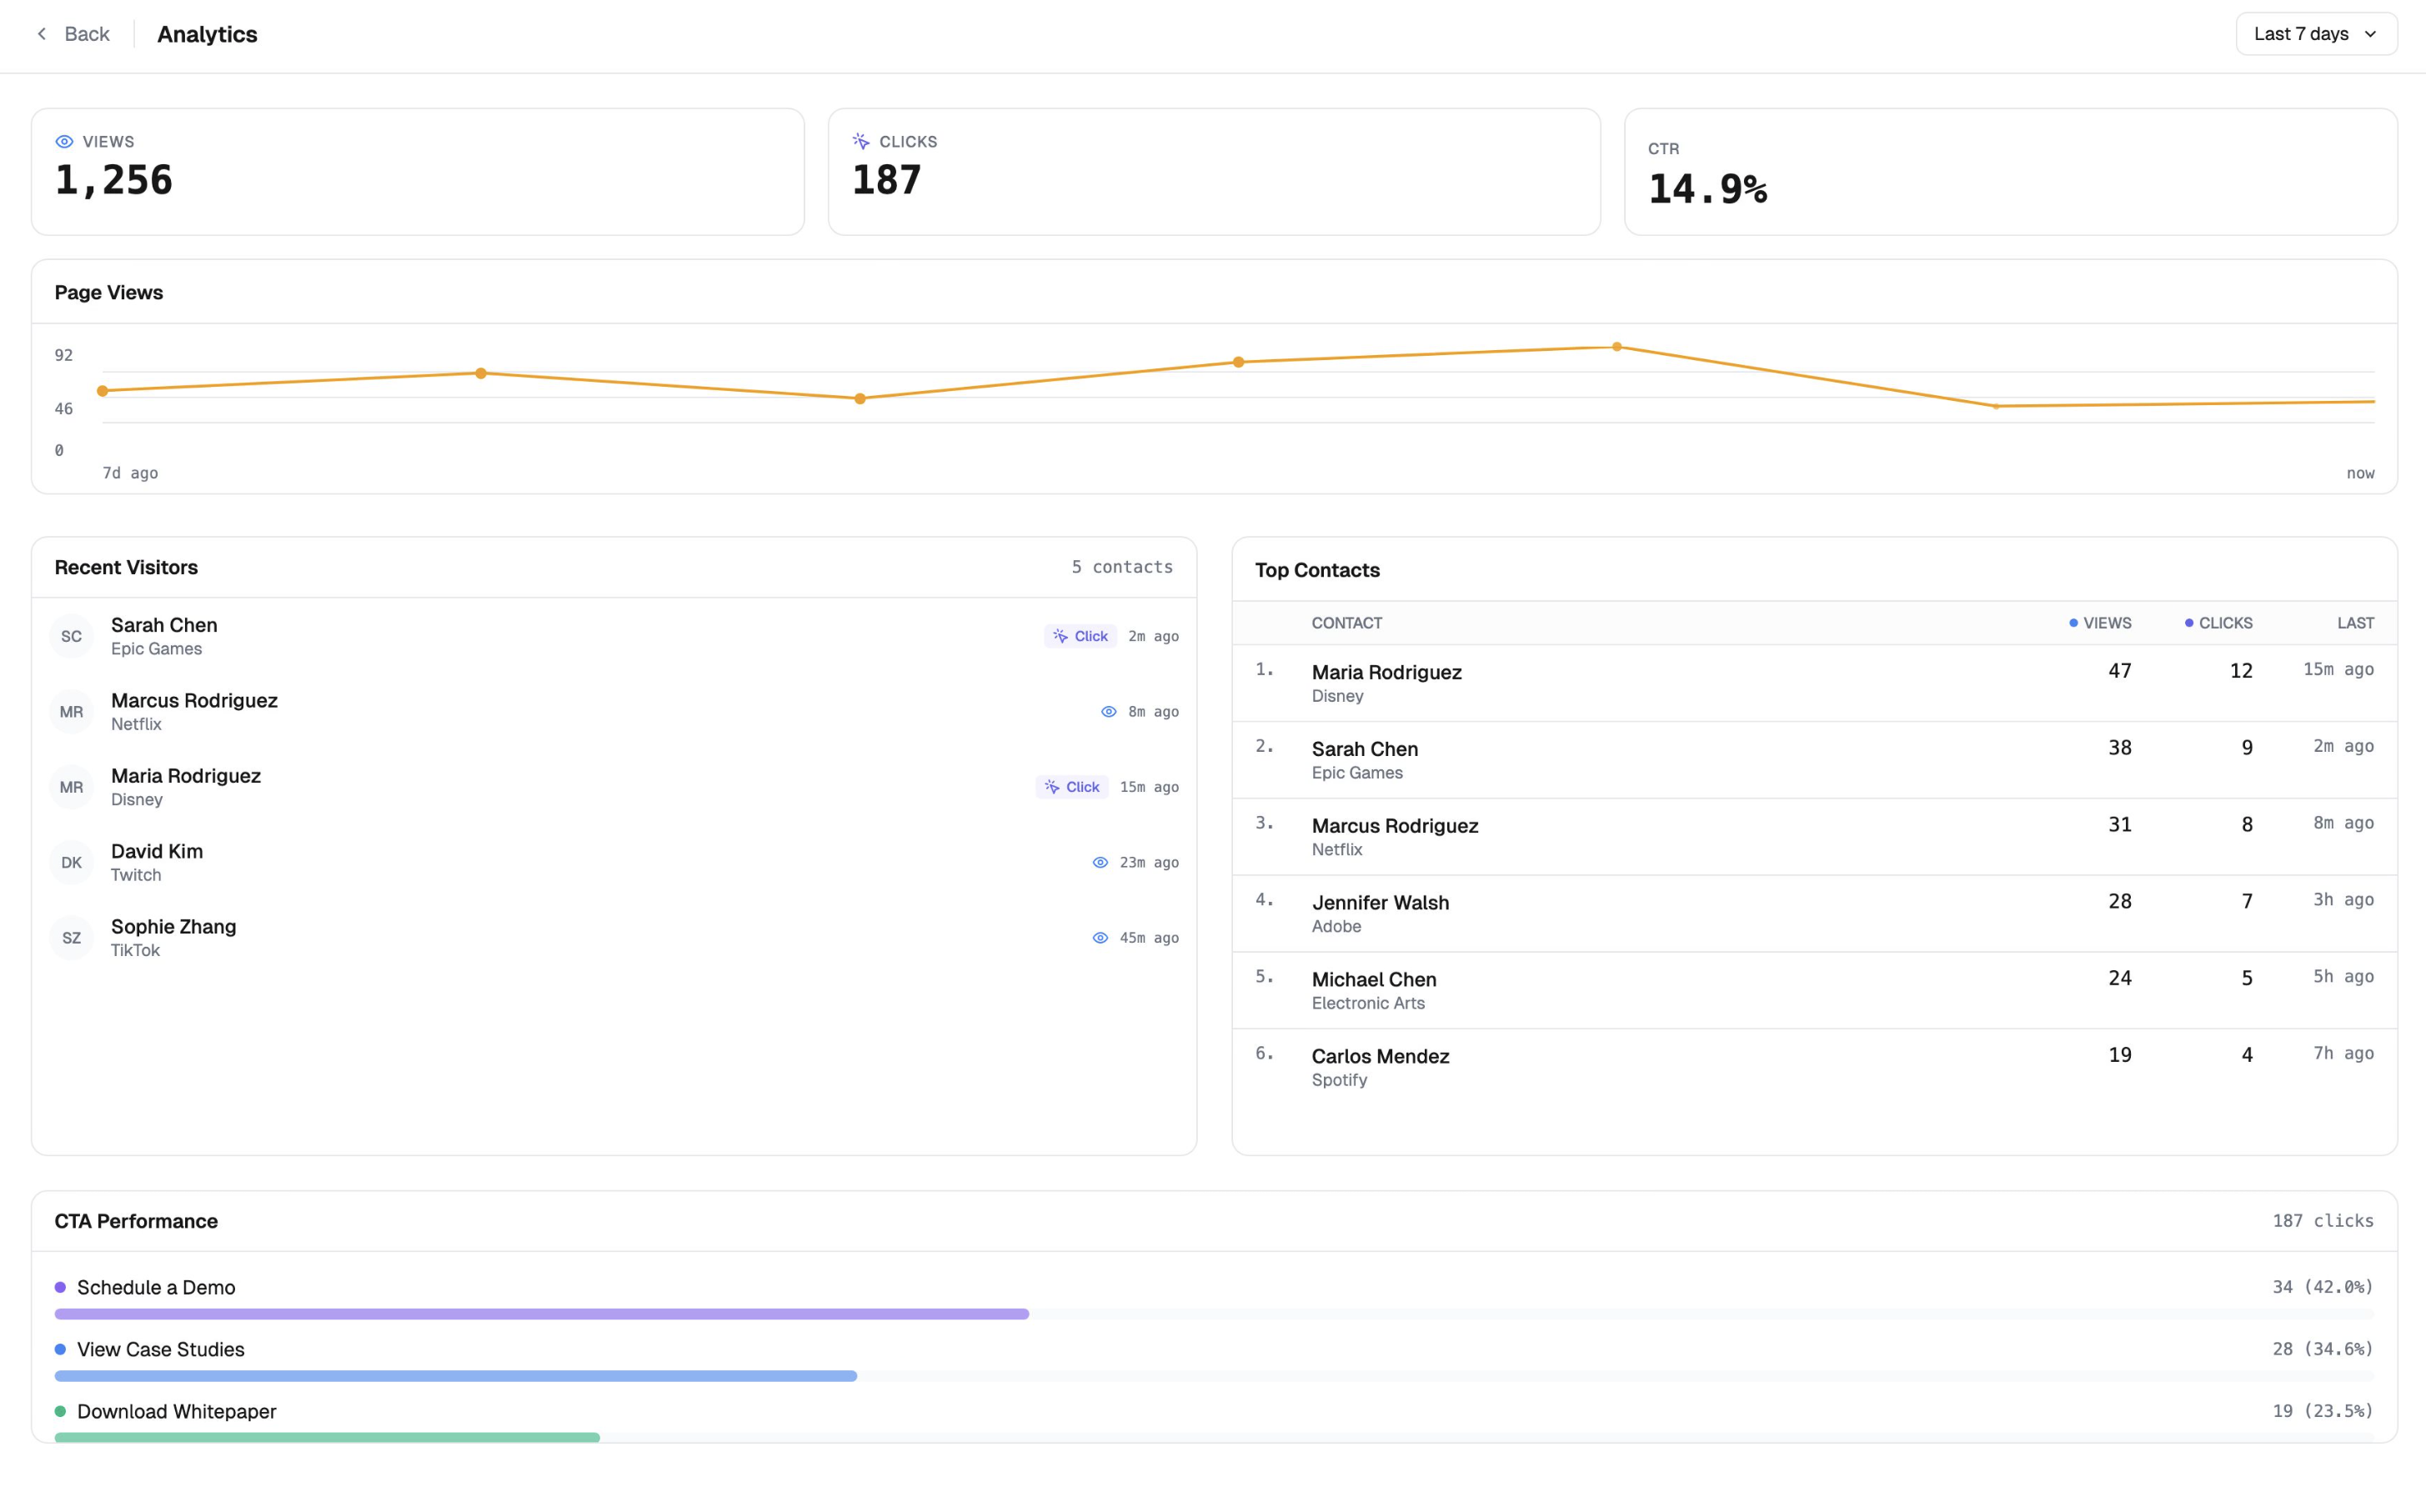
<Frame caption="Link Set analytics view showing engagement metrics">
  <img src="https://mintcdn.com/pockla/qpE0BiyqkWNDeIFk/screenshots/engagement-metrics.png?fit=max&auto=format&n=qpE0BiyqkWNDeIFk&q=85&s=35cc7a9e4baa0deea696d379218e311e" alt="Link Set analytics view showing engagement metrics" width="2910" height="1814" data-path="screenshots/engagement-metrics.png" />
</Frame>

## What's Next?

<CardGroup cols={2}>
  <Card title="Research Agent" icon="robot" href="/data/research-agent">
    Get AI-powered insights on your contacts
  </Card>

  <Card title="Boards" icon="table-columns" href="/boards/introduction">
    Visual pipeline view with AI research panels
  </Card>

  <Card title="Data Enrichment" icon="sparkles" href="/data/enriching-data">
    Auto-fill missing contact information
  </Card>

  <Card title="HubSpot Sync" icon="arrows-rotate" href="/integrations/hubspot/overview">
    Push engagement data to your CRM
  </Card>
</CardGroup>
