End-to-end quickstart walkthrough
Step 1: Connect Data
Import the contacts you want to create pages for.- CSV Import
- HubSpot
- Manual
- Click Upload CSV from Quick Actions on your dashboard
- Upload your spreadsheet
- Map columns to Pockla fields (email, name, company, etc.)
- Review and click Import
CSV import flow showing column mapping interface
Step 2: Generate Links
Create a Link Set—a collection of personalized pages, one per contact.- Click Create Link Set from Quick Actions
- Choose your source:
- From a List – Select an existing list
- Select Contacts – Pick individual contacts
- Enter the URL of the page you want to personalize
- Use the AI chat to configure which elements to personalize
- Preview how pages will look for different contacts
Link Set creation flow
Step 3: Install Snippet
Add the Pockla snippet to enable personalization on your site.You can skip this step initially, but you won’t see engagement analytics until it’s installed.
Step 4: Publish
Make your personalized pages live.- Review your Link Set in the preview
- Click Publish
- Each contact gets a unique URL (e.g.,
pages.pockla.io/abc123) - Share links via email, LinkedIn, or your outreach tool
Link Set instances view showing generated URLs and publish button
- Track views in real-time
- See engagement metrics per contact
- Push data back to HubSpot (if connected)
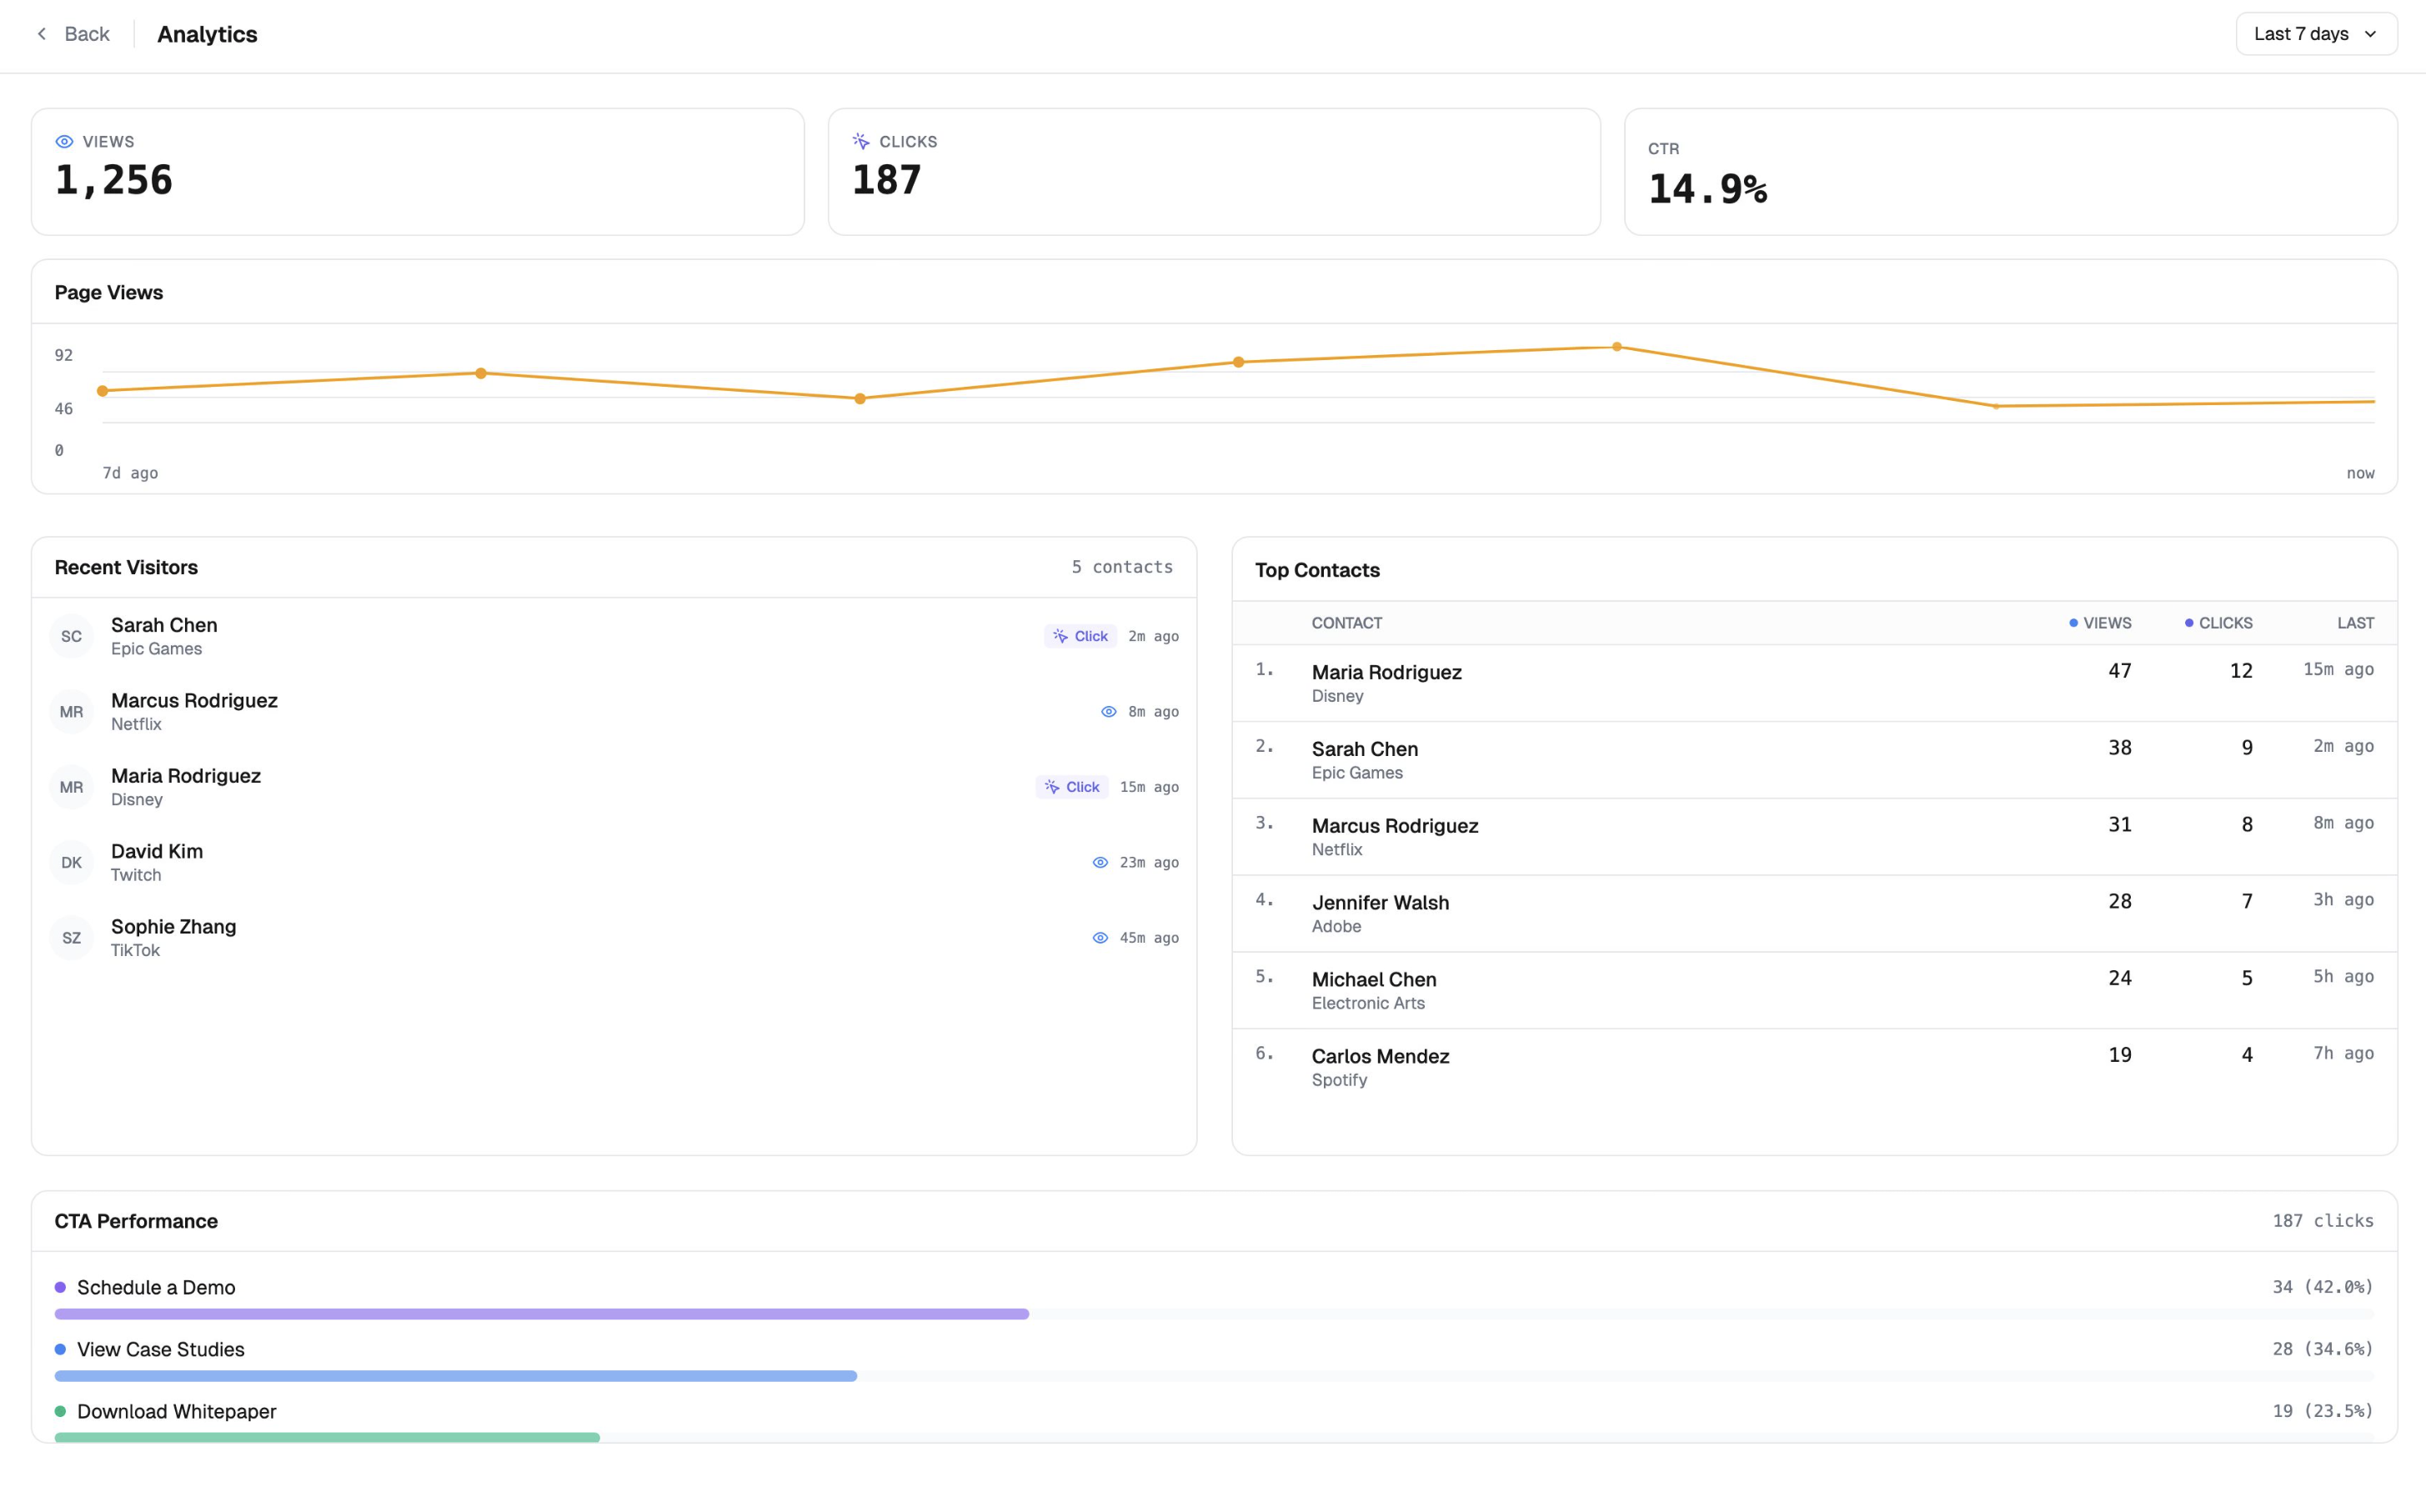
Link Set analytics view showing engagement metrics
What’s Next?
Research Agent
Get AI-powered insights on your contacts
Boards
Visual pipeline view with AI research panels
Data Enrichment
Auto-fill missing contact information
HubSpot Sync
Push engagement data to your CRM